I used to keep all my sandpaper in a plastic bin, where I’d have to go through a bunch of sandpaper to find the grit I needed. I finally got around to making a simple organizer that I hung on the side of a shelf unit in my shop, where I keep my sanders. This can be easily wall mounted as well. One of the features is the use of whiteboard material to make it easy to reorganize and relabel what is in each slot.
Category: Shop Organization
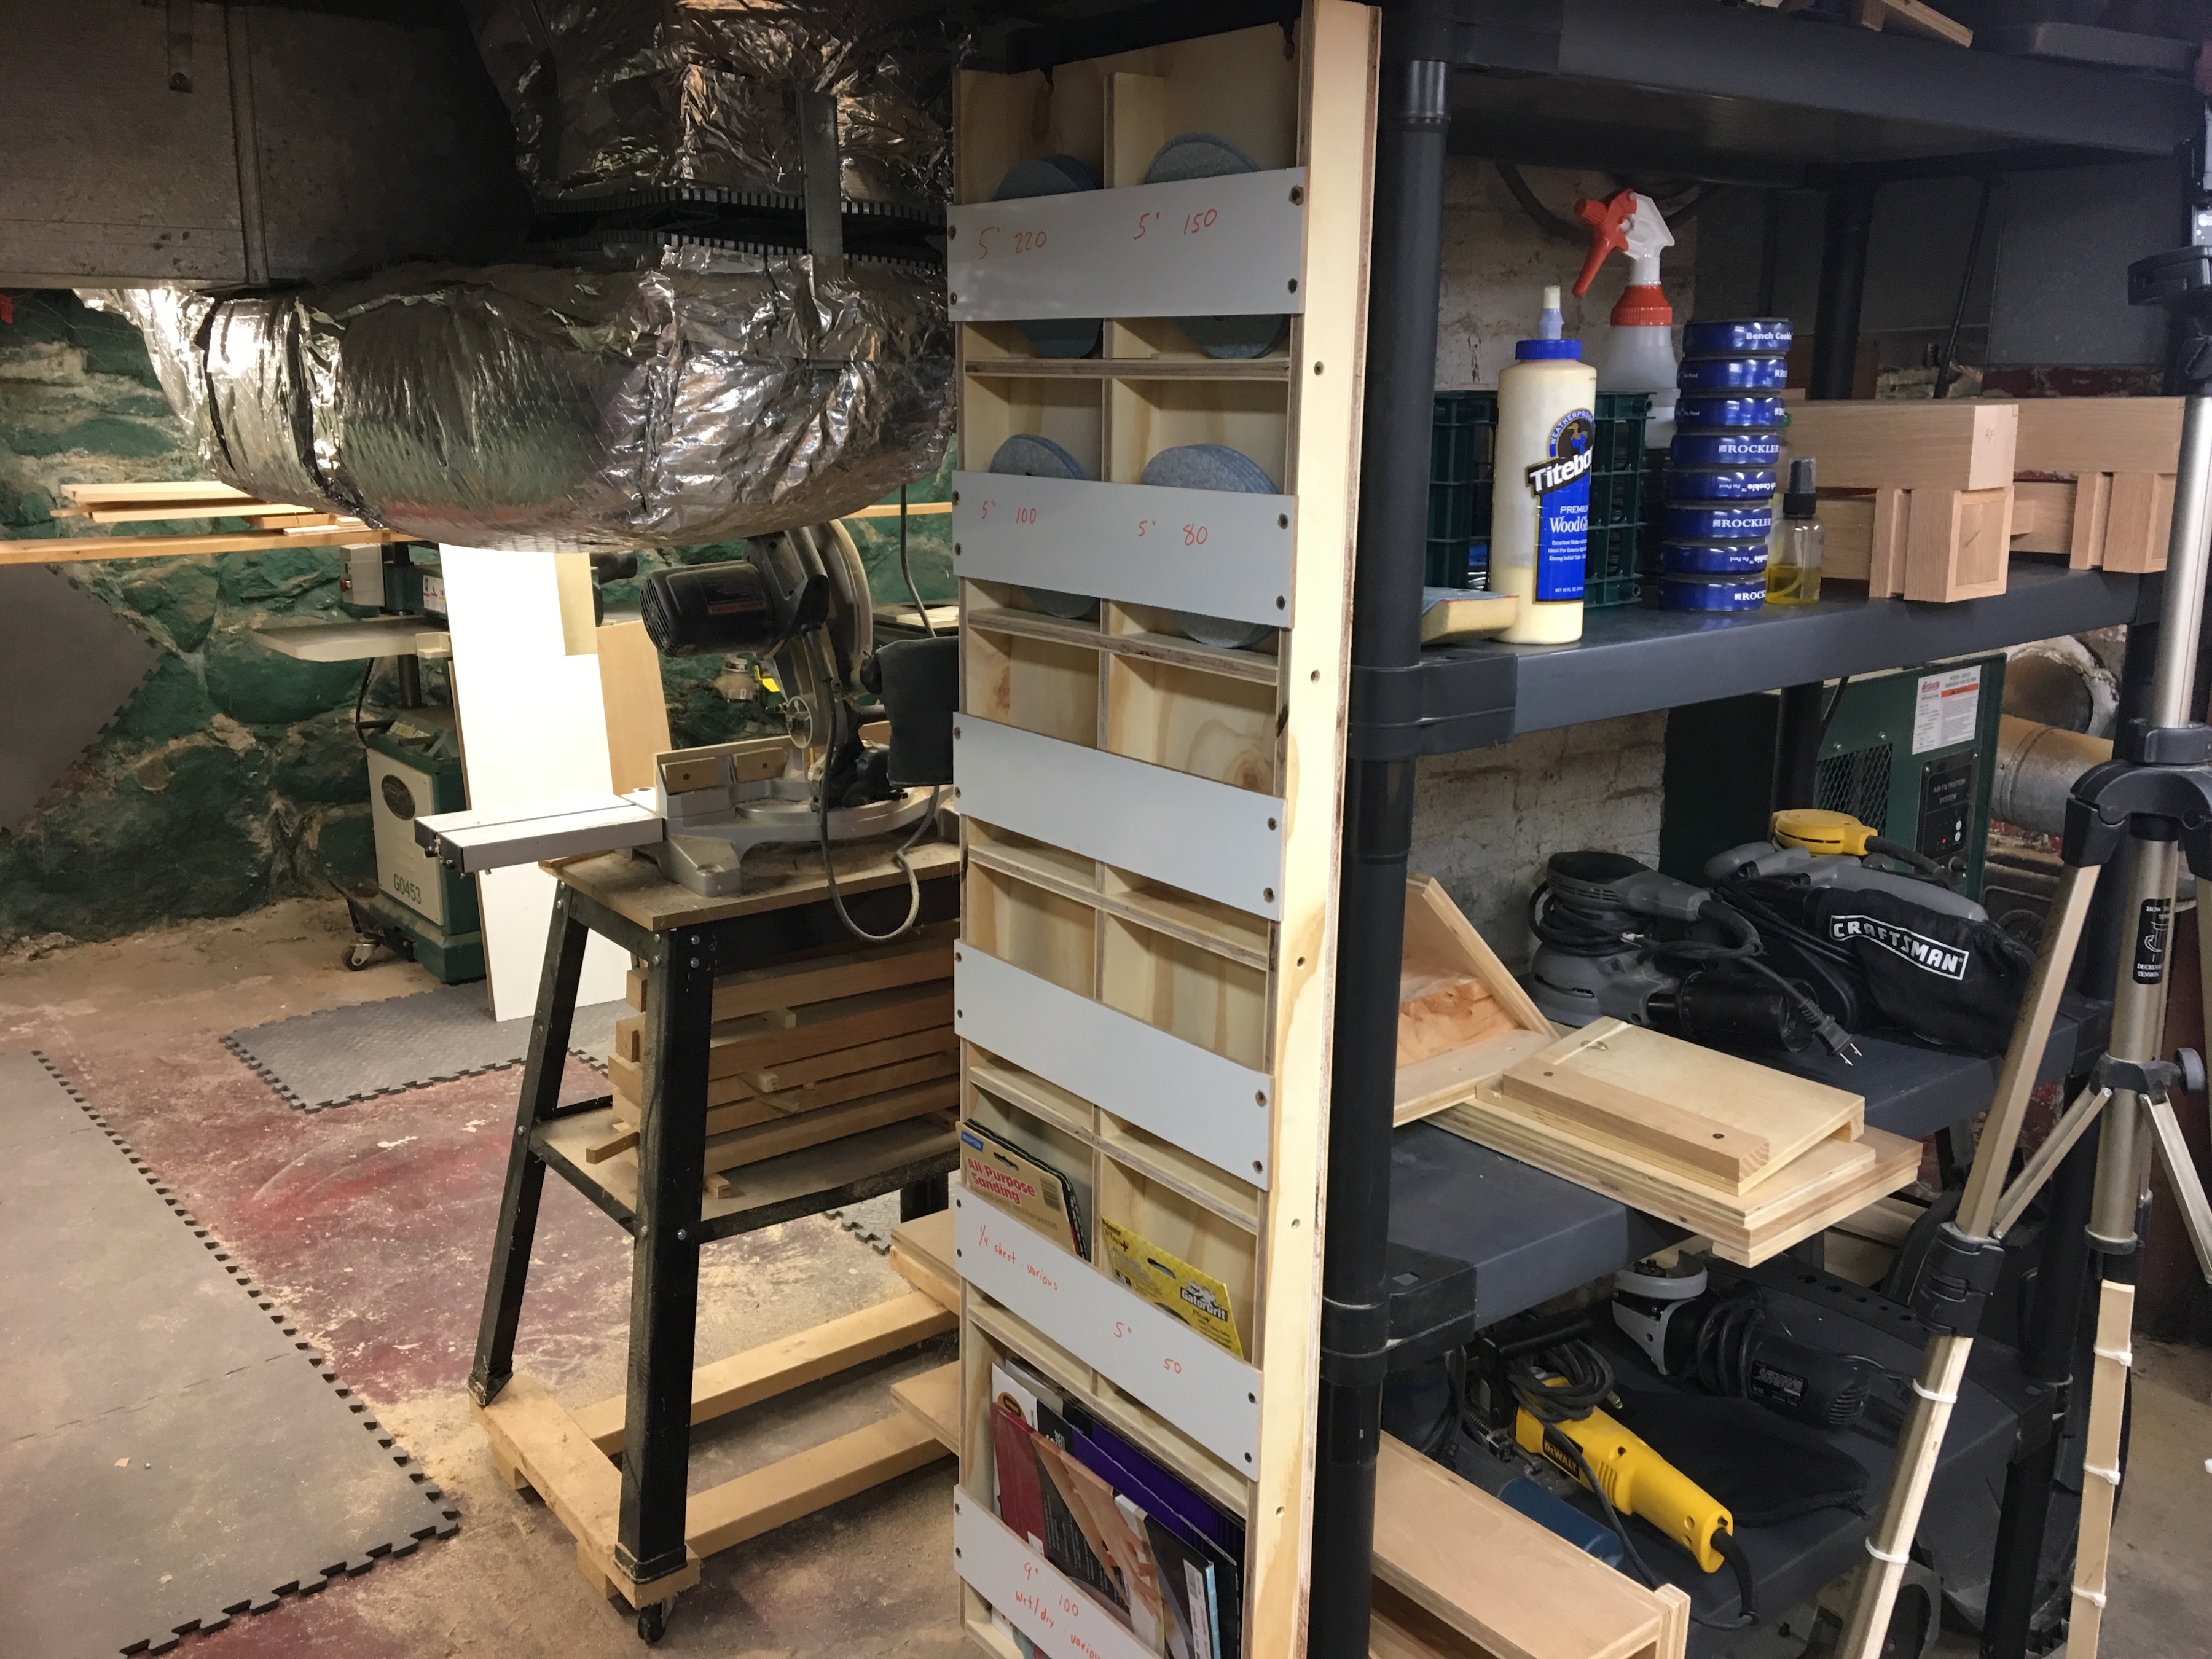
My First Lie-Nielsen and French Cleat Tool Storage System
I hope everyone had a great Holiday season and that the New Year is treating you well. I haven’t posted much since the Holiday season kept me pretty busy, but I actually did have some things I did in December and beginning of January that I think are worth posting.
I went to a Lie-Nielsen tool event in October of 2009 which I was really impressed with, so when they were coming back to the area (this time in Beverly, MA), I went… with a budget. While there, I picked up this sweet dovetail saw – my first Lie-Nielsen tool.
I also got some time in the shop to work on some organization. I have one section of wall in my basement that was an ideal place to put a French Cleat system, which makes it much more functional than looking at a stone foundation wall. I got this idea from The Wood Whisperer (Episode 106). Basically the idea is to have a cleat cut at the top at 45 degrees toward the wall, then you make custom hangers for your tools with a mating 45 degree hanger.
For my setup I put up some 2×4’s, then mounted pine panels to them. I then put up some basic trim the same thickness as the cleats (3/4″). Of course I had to make it “official” by putting up my “The Wood Lab” sign.
And what was my first hanger? One for my shiny new Lie-Nielsen dovetail saw of course! I’ve posted some pictures below.
Some Shop Organization
I went and sprained my foot and ankle earlier this week, so figured I would actually post what I was able to wrap up last week – the shelving unit that goes above the air compressor.
One of key things for my basement is to try and utilize as much space as possible, and being in an old house (built in 1860), things are sometimes in an odd spot. As you can see in the picture, the column is holding up a beam above, and the space otherwise would be somewhat wasted. Luckily the air compressor fit nicely just behind it. The shelves above you actually saw in a previous post 1/2 done. The second unit is up on the right and is joined in the middle by a piece of MDF that sits in front of the column (the whole unit is made of MDF – being a novice, I figured it was cheap material good for shop use and in case I made a mistake with my router routing out the dados for the shelves). Then I installed a small strip of pegboard to the joining piece of MDF.
Today is the first day I’ve been able to hobble around mostly without the crutches… So hopefully, I’ll be back in the shop soon!